Pages

Showing posts with label craft. Show all posts

Monday, February 10, 2014

DIY Gymnastics Balance Beam

My daughter has recently started her first session of gymnastics and I've been thinking of ways to get her to practice some of the things shes learned, at home. Well, of course my mind started to twitch the second I stepped into the gym and I began breaking things down and coming up with ways to construct them at home. And my balance beam was born. 
What you'll need: 


A 4x6x8 board
A 1x4 cut into 18inch pieces
Carpet pieces-I used inexpensive woven rugs 
 Staple gun
Staples
Hammer
Nails


Wrap the carpet or rug around the post, leaving some at the end of the board to wrap. Staple the rug to the SIDES of the board. Don't staple it to the top! You don't want tiny toes getting hurt if one pops out of place! Then flip it over, pull the carpet tight and staple it to the bottom of the board. Cut off any excess material. Continue to do this with the rest of the material until the whole board is covered. 

Don't forget to leave some on the ends to wrap around. 


Cut off the extra carpet on the bottom, just leave the top part to wrap around the bottom and then staple it to the board.


Now nail the 1x4 boards to the bottom. I used four and spaced them equally apart.


Now flip it over and PRESTO you have your very own floor balance beam! And hundreds less than the professionally made ones! SCORE!

Tuesday, April 2, 2013

DIY Handprint

I'm always looking for neat gift ideas for my daughter to give her grandparents and great grandparents for the holidays. I've given personalized picture frames for the past couple a years and really wanted to change it up. So I found a stepping stone recipe and decided to tweak it and make it so that it could be hung inside the house instead of being outside. 


What you'll need:
Flour
Salt
Water
Puffy Pa,.;int
Ribbon
Mixing bowl
Strainer
Mod podge
Foam sponge
Something to gauge how big you want it to be- I used a large metal measuring cup
Baking sheet lined with aluminum foil
Rolling Pin
Plastic Straw


Take 1/2 cup of salt and 1/2 cup of flour and sift together over mixing bowl. Mix in about 1/4 cup of water or more until the dough forms a slightly moist ball- the consistency of Play-Doh.


Now roll out dough,on a floured surface, to desired size. I rolled mine to about 1/2 inch thickness


This is how I made sure each one was about the same size


Take the straw and put two holes in the dough for the ribbon.


Space them like this.


Next press your child's handprint into the dough. Make sure each finger makes a good impression. Then lay on a floured baking sheet and Bake in the oven at 200 degrees for 3 hours. Take out and let cool completely on cooling rack and Leave them to cool and harden over night. After they are done you can thread the ribbon through the holes and write your child's name and the year with the puffy paint. After the puffy paint dries, coat the Modge Podge over the entire front surface to give it a nice sheen! We did this for a lot of people and it was a huge hit!

DIY Kitchen Menu

So what started off as me trying to make my daughter a magnetic chalkboard, which was a major FAIL, ended up being turned into a large menu for our kitchen. I wanted to make the chalkboard without using a sheet of metal because I was concerned about the sharp edges and how I would cover them, so I chose to try out magnetic paint by Rustoleum. It worked horribly! Now I had this huge board sitting around and no idea on what to do with it. It wasn't until we started planning our meals for two weeks (for our money saving budget planning) that I thought to use it the way we do now.

What you'll need:
1 piece of wood board-pick one out that's smooth with little dimples
1 long piece of trim cut to frame board
Chalkboard paint
1 small roller
Foam roller sponges
Gorilla glue
Small paint liner
Small paint bucket
Paint brush
Paint for the trim- I used left over cream colored paint
News paper or plastic to protect surface
Wall mounts
Brackets to attach for hanging


Using foam roller paint on chalkboard paint- follow instructions on your brand of paint. I used Rustoleum brand and painted on 2 coats. At this time also paint the trim pieces. Let all painted items dry for 2-3 days before gluing trim to board


After all paint thoroughly dries, take a damp towel and run it along the part of the trim that is going to be attached to the board. Then run a small thin line of gorilla glue down the length of the trim. Don't use too much! Gorilla Glue expands A LOT!


Once all pieces are laid where they need to be, apply pressure to trim to help seal the glue. You can buy clamps or do what I did and lay heavy objects on it till it dries, which takes a few hours. After glue dries you can now add the hanging brackets to the back of the board.


Here is the finished product right after and in use! We love the personality it adds to our kitchen and the ease it brings to deciding on dinner!


Saturday, March 16, 2013

DIY Silhouette Portrait

I've always loved looking at the silhouette portraits my MIL has of my husband and SIL, but like I always do, I find myself wondering, 'How can I make that on my own?' .  Well, I have done it! But of course I have added my own special flare!


What you'll need:
The picture you want to use as the silhouette 
Mod podge
Black paint - we used a valspar sample from Lowes
A few scrapbook pages with different prints
A picture frame- I fell in LOVE with this oval one
News paper, packing paper or any type of scrap paper
A fine small tipped paint brush
A small regular tipped paint brush
A sponge brush
Pen
Regular scissors
Exacto knife or small scissors - I used manicure scissors


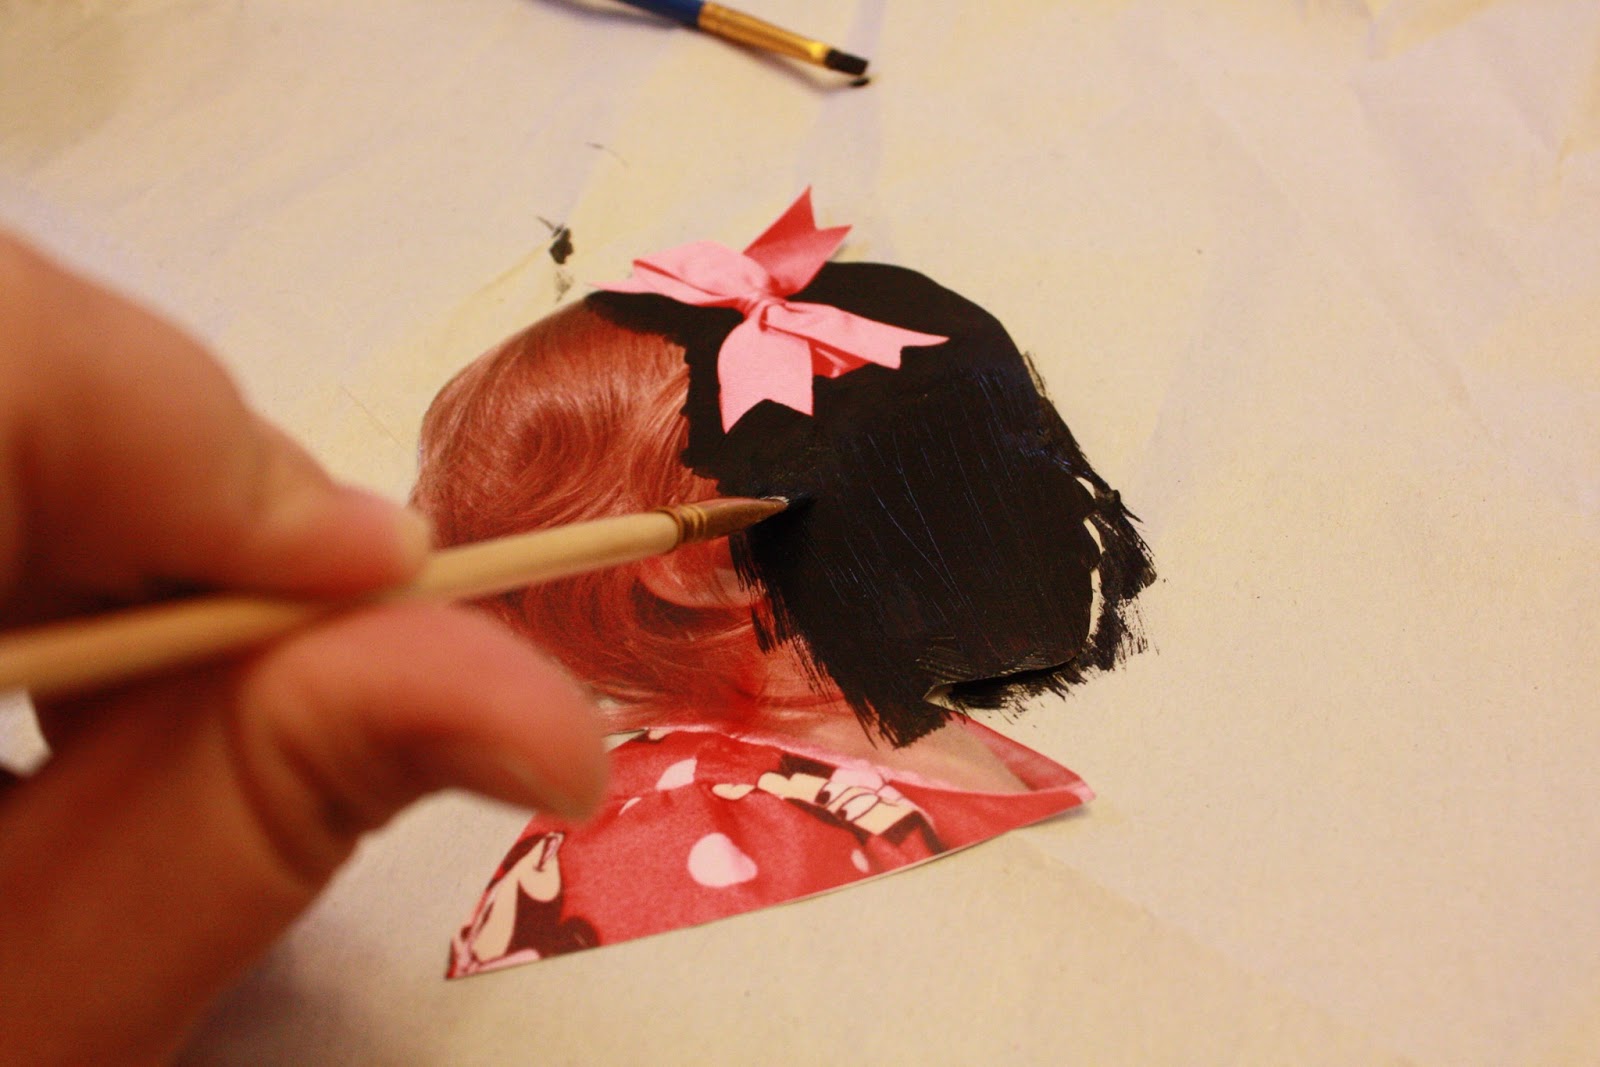
Now cut out the portrait or picture. I took this picture of my daughter and used the manicure scissors to really cut out the detail. I made sure that I accentuated her crazy long eyelashes and curls. 


Using the fine tipped paint brush, on the newspaper, I carefully painted around the bow on her head. A bow tie for little boys would be too cute! I can't wait to make one if we have a boy! If you don't have a piece in the picture you want to accentuate, then skip to the next step.


Paint the rest of the cut out and allow it to dry completely. Apply a second coat if necessary.


Choose which ever scrap book paper you like and cut it to fit the picture frame.


Coat the back of the picture with mod podge and place in the center of the scrapbook paper.


Then spread mod podge over the entire front of the scrapbook paper. Let dry completely and place in frame. I have gotten so many compliments on this! I have been asked where I got it done at and beam when they rave on how professional it looks! Enjoy!