I've always loved looking at the silhouette portraits my MIL has of my husband and SIL, but like I always do, I find myself wondering, 'How can I make that on my own?' . Well, I have done it! But of course I have added my own special flare!

What you'll need:
The picture you want to use as the silhouette
Mod podge
Black paint - we used a valspar sample from Lowes
A few scrapbook pages with different prints
A picture frame- I fell in LOVE with this oval one
News paper, packing paper or any type of scrap paper
A fine small tipped paint brush
A small regular tipped paint brush
A sponge brush
Pen
Regular scissors
Exacto knife or small scissors - I used manicure scissors

Now cut out the portrait or picture. I took this picture of my daughter and used the manicure scissors to really cut out the detail. I made sure that I accentuated her crazy long eyelashes and curls.

Using the fine tipped paint brush, on the newspaper, I carefully painted around the bow on her head. A bow tie for little boys would be too cute! I can't wait to make one if we have a boy! If you don't have a piece in the picture you want to accentuate, then skip to the next step.
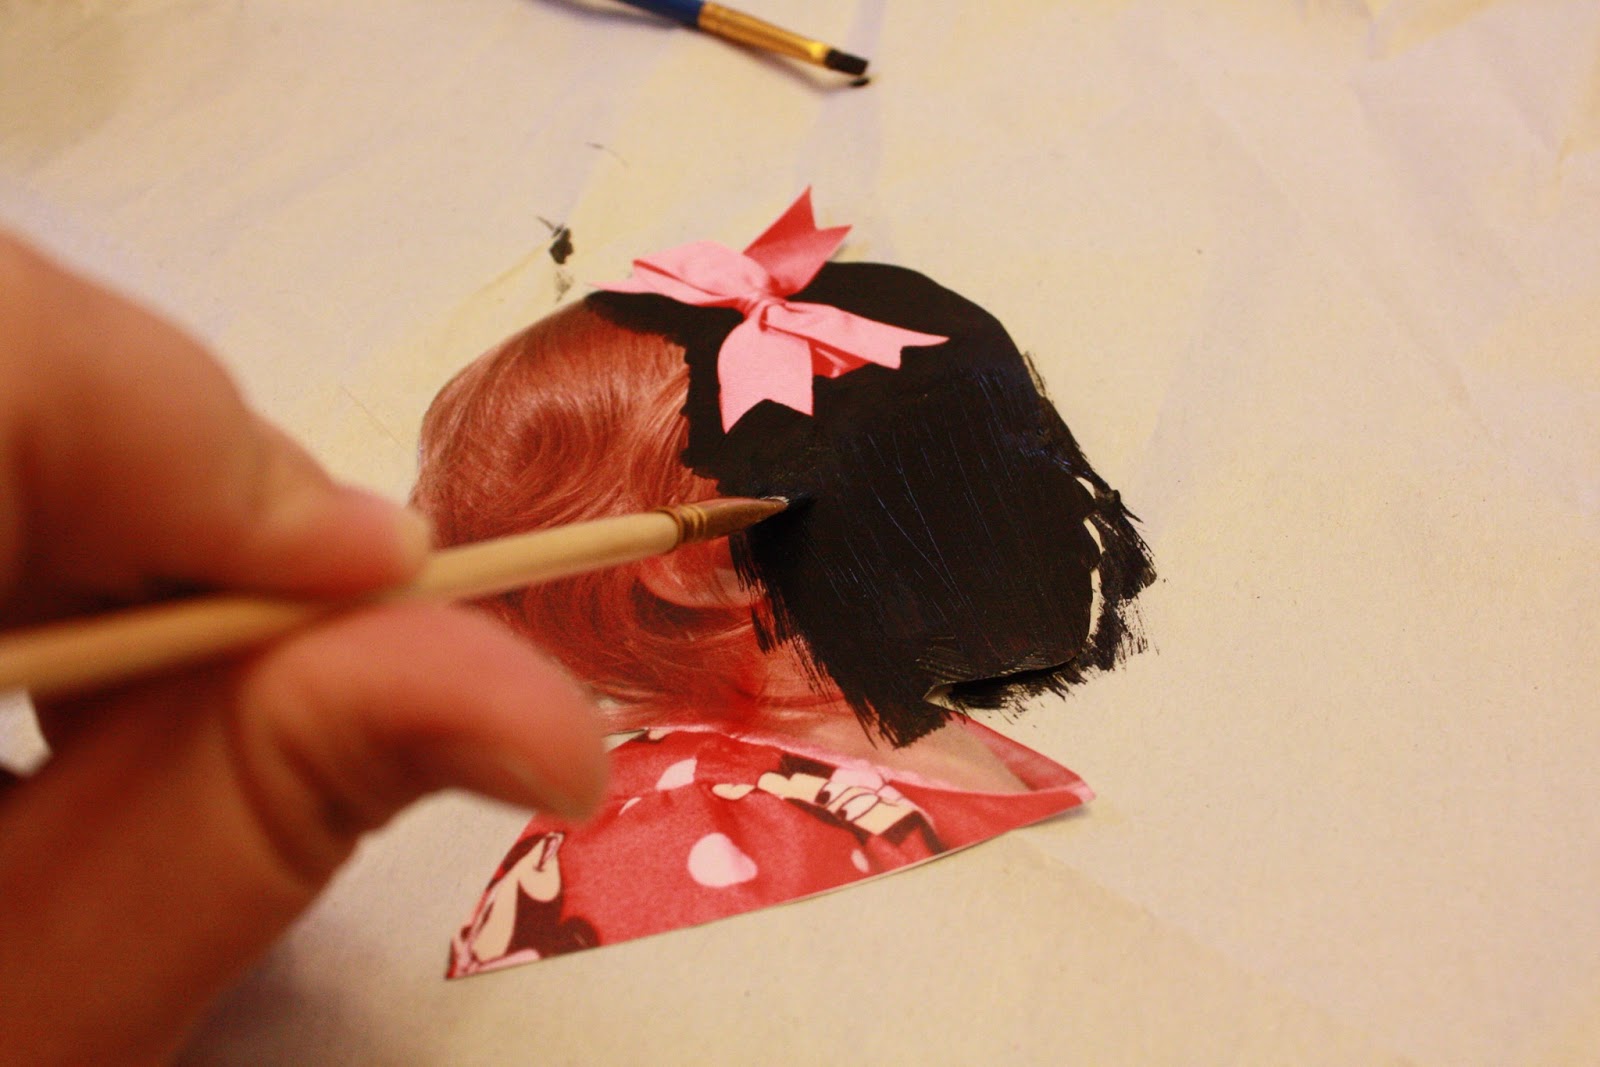

Paint the rest of the cut out and allow it to dry completely. Apply a second coat if necessary.

Choose which ever scrap book paper you like and cut it to fit the picture frame.

Coat the back of the picture with mod podge and place in the center of the scrapbook paper.

 Then spread mod podge over the entire front of the scrapbook paper. Let dry completely and place in frame.
 I have gotten so many compliments on this! I have been asked where I got it done at and beam when they rave on how professional it looks! Enjoy!
No comments:
Post a Comment